Want to edit or remove the robots.txt file for your website?
There are occasions when search engine bots are prevented from indexing a website due to an improperly configured robots.txt file.
If your webpage is indexed on Google and you want to remove it urgently, you’ll have to update/add the robots.txt file on your domain or sub-domains root directory.
Using robots.txt, you can disallow/allow the website page to get indexed by the Search Engine. In this short guide, I’ll show you how to edit & remove the robots.txt file from WordPress.
Here’s How the WordPress robots.txt Default File Looks
User-agent: *
Disallow: /wp-admin/
Allow: /wp-admin/admin-ajax.php
The * after User-agent means that the robots.txt file is for all web bots visiting your site.
The Disallow: /wp-admin/ tells the bots not to visit your wp-admin page.
What Does Robots.txt do?
Robots.txt can be used to manage crawler traffic to your website and prevent search engines from indexing certain files. It also specifies the sitemap’s location. You can also use the robots.txt file to block resources like unimportant images, style files, or scripts.
However, if the absence of these resources makes it harder for Google’s crawler to understand your webpage, you should not block them.
How to Remove & Edit Robots.txt From a Page
Method 1: Edit Robots.txt File Using AIOSEO
All in One SEO (AIOSEO) is one of the best WordPress SEO plugins that can be used to edit the robots.txt file. It gives you control of your site and configures a robots.txt file that will override the WordPress default file.
AIOSEO is a WordPress SEO plugin, which helps you improve your site’s search rankings, so you can grow your business and get maximum traffic.
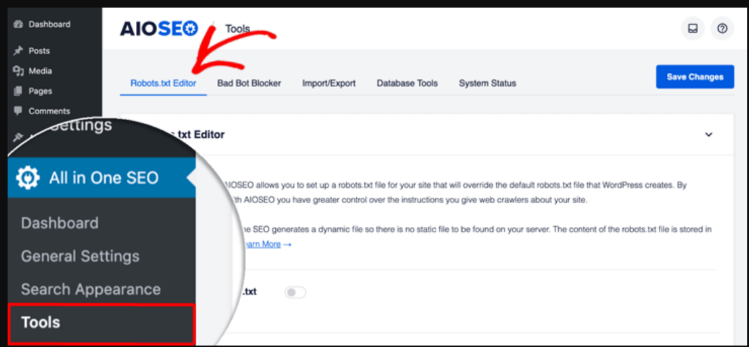
To edit your robots.txt file, click on Tools in the All in One SEO menu. You then have to click on the Robots.txt Editor tab.
AIOSEO will create a dynamic robots.txt file. The file’s content is stored in your WordPress database, and you can view it in your web browser.
After entering the Robots.txt Editor, Enable Custom Robots.txt.
After that, you’ll see the Robots.txt Preview section, which shows the WordPress default rules you can overwrite. The default rules tell bots not to crawl your WordPress files.

You can add your own rules using the rule builder.
The rule builder helps you specify for what pages the bots should crawl or not.
For example, if you would like to add a rule that blocks all bots from a temp directory, you can use the rule builder to do this.
To add a rule, you must enter a user agent in the ‘User Agent’ field. You can use a * to apply the rule to all user agents.
Now you’ll have to select whether you want to ‘Disallow’ or ‘Allow’ the search engines to crawl.
After that, enter the directory path or filename in the ‘Directory Path’ field.
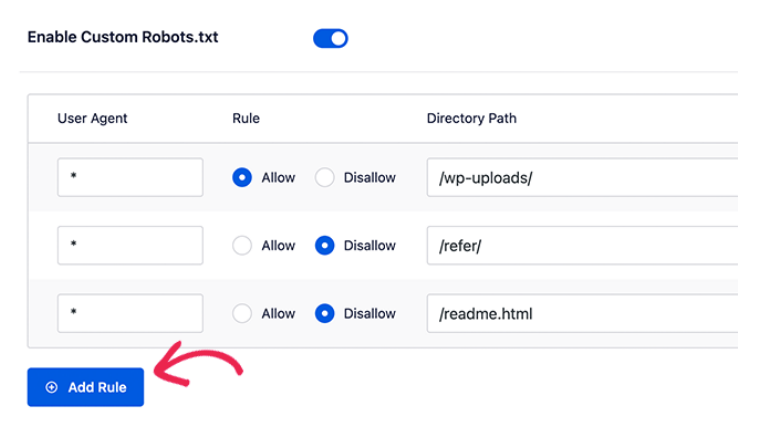
The rule will be applied to your robots.txt automatically. Click the ‘Add Rule‘ button to add another rule.
You can keep on adding rules till you create the ideal robots.txt format.
Your custom rules will moreover look like this.
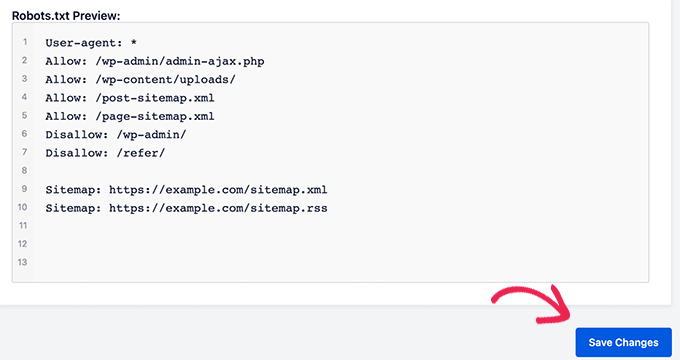
Once you’re done, click on the ‘Save Changes’ button.
Method 2: Manually Edit Robots.txt file Using FTP
To edit the robots.txt file using this method, use an FTP client
Connect to your WordPress hosting account with the help of an FTP client.
Once inside, you can see the robots.txt file in your site’s root folder.
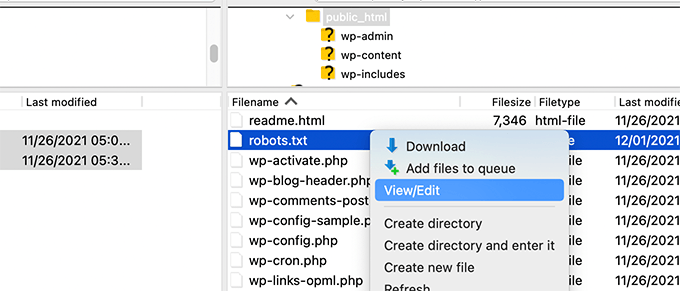
If you don’t see this, you don’t have a robots.txt file. You’ll have to create one in that case
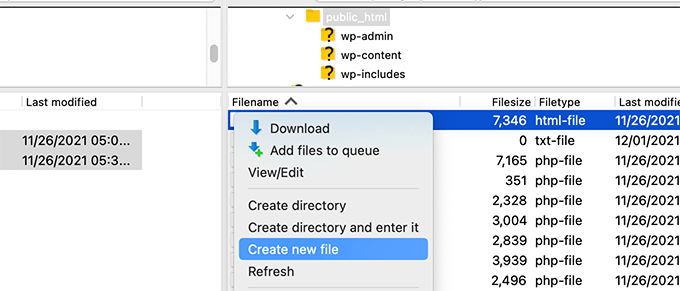
You can download Robots.txt to your computer and edit it using a plain text editor like TextEdit or Notepad.
After saving your changes, upload them to your site’s root folder.
How to remove robots.txt from the WordPress website?
To remove robots.txt from the WordPress website, follow these instructions.
Go to settings in your WordPress and see if this box is ticked:
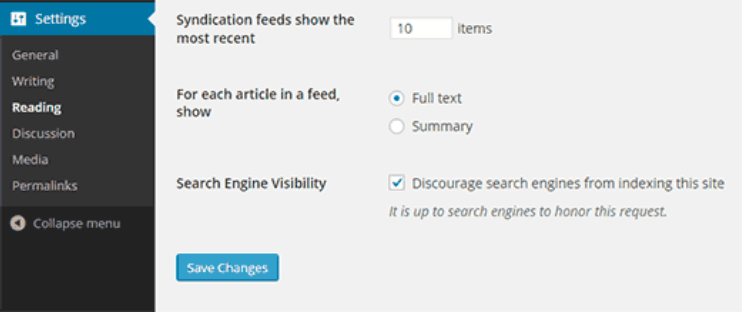
If so, uncheck it, and the robots.txt will change to
User-agent: *
Disallow:
How to create a robots.txt file if you want it back after deleting it?
You can use SEOToolr Robot.txt Generator to create a robot file if you want it back after deleting it.
- Select the option from the drop-down and enter your sitemap URL. You can do this by pasting the link to your website’s sitemap. Leave it blank if you do not have it.
- After that, enter a file’s directory that you want to disallow.
- Finally, click on create robots txt button, and your robots.txt file will be generated.
Should I disable robots.txt?
No, you should not remove SEO robots.txt. Google recommends all website owners have robots.txt. It has even put up a warning not to use a robots.txt file to hide your web page from Google search results. If you want to block your webpage from search results, you can use another method like password protection or a noindex meta tag on the page.
Is it a wise decision to delete robots.txt?
Ideally, your website should have a robots.txt file. Think of a robots.txt file like a “Code of Conduct” posted on the wall at a community center or a gym. The sign itself holds no power to enforce the rules, but “good” patrons will follow all the rules, while “bad” ones will break them and get banned. A robots.txt file will keep your website optimized for SEO. It will also keep good bot activity under control. So think carefully before taking any step!