When individuals start a business website, configuring the payment option is of great significance. A seamless and secure payment option can facilitate a better user experience whereas a glitchy and unsafe payment gate might result in dampening user experience and establishing your site as an untrustworthy platform.
Luckily, users who build their site on WordPress can integrate multiple payment methods and configure different payment gateways safely at their disposal.
The payment gate can be integrated without compromising the safety of your site or your users, all the sensitive information can be kept safe and the payment method can be completely smooth so that every transaction can be completed within a snap.
In fact, accepting payments through WordPress is easier than configuring payment on any other platform.
But before we get into it, let’s look at the requirements for a WordPress website to accept payment.
Prerequisites for Accepting Payments in WordPress
Just like other features in WordPress, setting up the payment is relatively straightforward. All you need to do is to give detailed emphasis to each step, and you will be able to set up WordPress payments without any setbacks quickly.
To make it simpler for you, dive into these four prerequisites that will be essential before configuring the payment method on your WordPress site:
1. Secure websites on WordPress
Several countries have stringent rules regarding data collection governance and retention, and a Secure WordPress website includes HTTPS with SSL.
It offers strict security with strong passwords and prevents website intrusion with threat monitoring. So when your customer enters the card details on the site, it ensures that the details aren’t visible to anyone else.
Have a WordPress security plugin or firewall or stay informed about PCI, GDPR, DSS, as well as other relevant rules that govern data protocols in the regions where you serve.
2. Fast and Secure web host
If you are starting your own e-commerce website on WordPress, then you must know that your selection of Web Host underpins almost everything else that you do.
A good host like Bluehost can bring your visitors the best user experience for a lifetime, while a poor-performing WordPress host will be the obstacle in streamlining the purchase process.
So choose wisely, do your research and then make an informed decision regarding the host.
3. SSL
The Secure Socket Layer, otherwise known as SSL, is a default security method for the website that encrypts all visible traffic between the visitor’s browser and your website.
A secure connection is essential while dealing with payments and sensitive credit/debit card information, and for this, an SSL certificate can be massively advantageous.
4. Stunning and responsive design
People will pay for your product or service when your website is navigable and you provide users with a positive experience.
Starting from the interface to the loading speed, everything must be impeccable, and so, you need to get an eye-catching design with effortless performance to drive conversions to your site.
What Is a Payment Gateway and How Does It Work?
A payment gateway can be defined as an online payment service devised for e-commerce platforms to make and receive payments.
We all must have seen a payment gateway while paying online with our debit or credit cards or UPI. From there, we get an OTP, enter the OTP there, and then the payment proceeds.
However, a payment gateway does a lot more for the security of the payment than what we see on the surface by acting as a middleman between your website, the customer, and the payment processor.
Payment gateways are like standalone applications that make the payment encrypted by connecting your site and the processor servers.
Though there is a small commission for the gateway in the transaction, it handles everything and safeguards your transactions by using a secure platform and connection.
Still, confused? Well, then here’s how the whole concept of payment gateway works:
- The customers check out from their cart after selecting their desired product or service for your e-commerce site.
- They choose a payment method after they checkout, and then the payment gateway appears.
- The consumer enters their payment details in the gateway, and only when they wish or click on save, the payment details would be kept for future usage. The payment method can be anything ranging from PayPal and credit card to a debit card or something else.
- With this, the gateway processes all the payment data and securely transfers the collected information to the payment servers.
- Instantly the payment server reaches out to the bank server and authorizes the feasibility of the payment.
- Then the gateway informs your website about how the payment is confirmed.
- The gateway will transfer the amount to your account, the transaction will be complete, and you can start processing the order.

You might find the process to be quite detailed and elaborate as there are many steps, but all it takes is a few seconds. Technological advancements have enabled the payment gateways to be secure and fast, and you can easily manage the payments using these gateways without hiring someone or manually managing all the financial data on your own.
Popular WordPress Payment Gateways
Most users search for how to integrate payment gateway in WordPress when the actual question should be about what payment gateway is ideal for you.
So, to help you in choosing the best payment gateway here is detailed info on some of the most famous WordPress Payment gateways. Have a look!
1. Authorize.Net

Authorize.Net is a well-established payment gateway that can be seamlessly used for WordPress. The payment gateway is fast and secure, and it primarily uses credit cards.
Another amazing thing about Authorize.net is the new authorize.net addon which is now available with WPForm. This implies that you can now use your authorize.net account that will help you collect credit card payments on your WordPress website using your forms with WPForm.
The monthly gateway fee for Authorize.Net is 25$, and the per-transaction fee is 2.9% + 30¢.
2. Paypal
When we are talking about payment gateways, Paypal is one of the most hyped payment gateways all across the globe.
Several e-commerce businesses, online retailers as well as online service providers prefer PayPal as a preferred medium, as it can accept payment from credit cards, debit cards, PayPal accounts as well as some gift cards.
Talking about the commission or the processing fee, PayPal charges around 2.9% + 0.30 dollars per transaction, so you won’t have to pay a hefty processing fee as well.
Also, note that the fee can change depending on your type of account, so do check before you set up your account.
3. Stripe

Stripe is one of the most chosen alternatives among the most popular WordPress Payment Gateways. The platform is used by several online stores and works just like PayPal. The only difference here is that consumers have to enter their card details as they cannot use a login account like PayPal.
Also, Stripe is quite flexible, and it can be configured with different payment gateways such as Google Pay. Apple Pay etc.
The processing fee for Stripe is 2.9% +0.30 dollars per transaction.
4. Amazon Pay

Launched by the pioneer of e-retail, Amazon Pay is an excellent payment gateway that can be integrated into your website.
Especially if your customers have their Amazon accounts, then they can log in to their account and pay for products or services using their Amazon Pay account.
The platform doesn’t charge any monthly fees, but it charges up to 2.9% + 0.30 dollars per transaction.
5. Google Pay

Powered by the trusted name of Google, Google pay is a sensation in the world of payment gateways. The payment processor can be configured with Google infrastructure as well as android phones, and it can allow consumers to pay for their goods using all the details stored in their Google Pay account.
But, to integrate the payment gateway with your site, you need to configure Google Pay with WooCommerce or Stripe to accept it as a payment method.
The platform charges a minimum of 2.9% as a transaction fee when the payment is made using a credit card.
How to Accept Credit Card Payments in WordPress without a Shopping Cart?
Credit cards are like the staple payment procedures for most individuals and businesses all across the globe. When you are selling a product, service, or offering membership online, then a shopping cart is necessary.
And, if you are wondering how you can accept credit card payments without a shopping cart, then you can use WPForm and Authorize.Net integration, for that matter.
This integration can give you access to some effortless and easy-to-use features for keeping the sales on your site smooth.
Besides, the setup is exceptionally easy to install and compatible with mobile, so you can practically receive the payment from anywhere and anytime.
Authorize.Net also has its customizable advanced fraud detection, so you can use it to keep your transactions secure.
To accept payment through Authorize.Net and WPForms without any shopping cart, you can follow the below-mentioned steps:
- You need to connect Authorize.Net to your WordPress site. To do that, First you need to install and activate the Wpforms plugin.
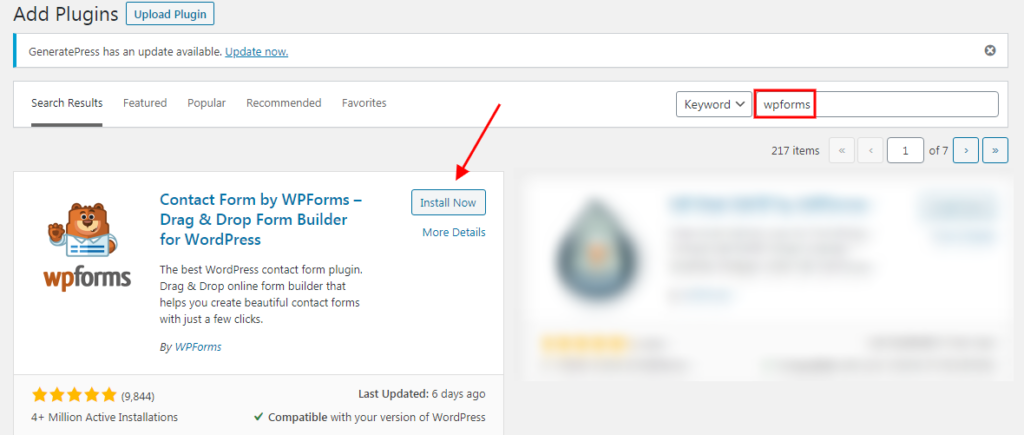
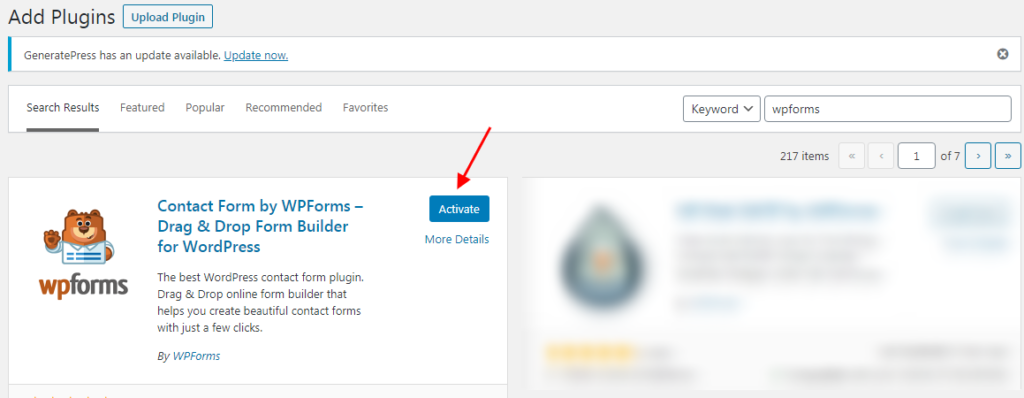
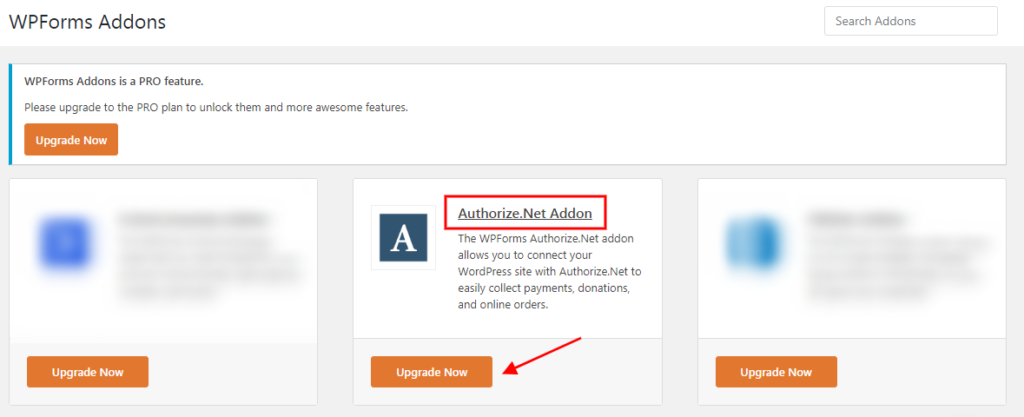
- And then open WPForms » Addons from the menu on the left side.
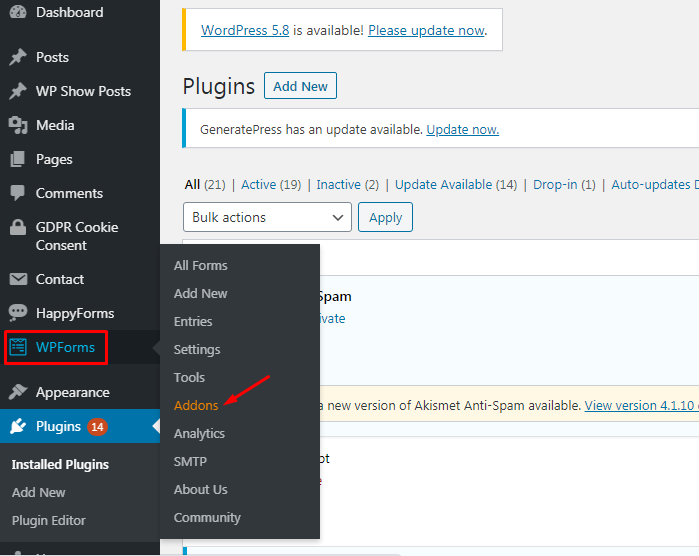
- You’ll be taken to the WPForms Addons page, Click on Upgrade Now to get the Authorize.net addon.
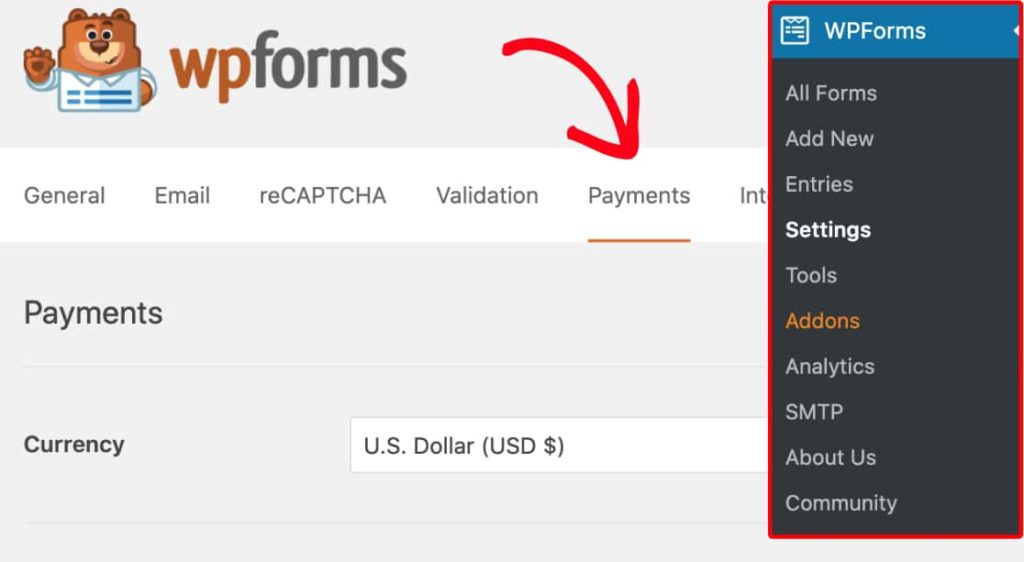
- And then open WPForms » Settings from the menu on the left side. From there click on Payments tab & select the currency and fill out the necessary details that are necessary for transactions.
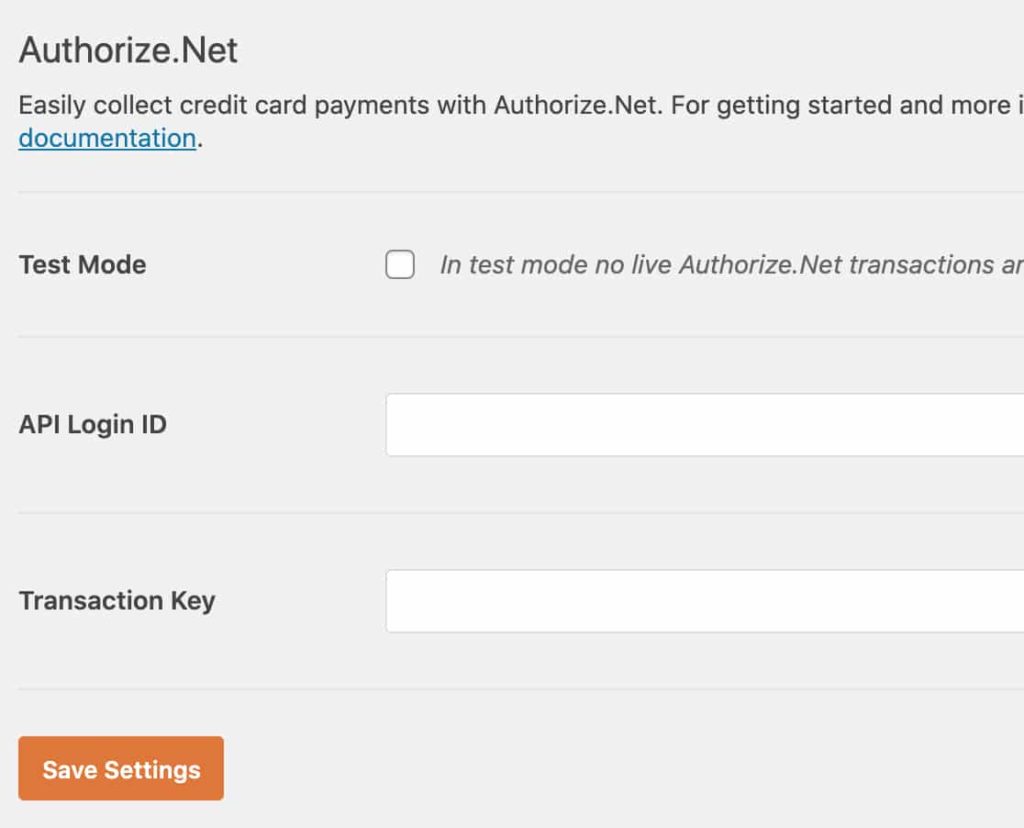
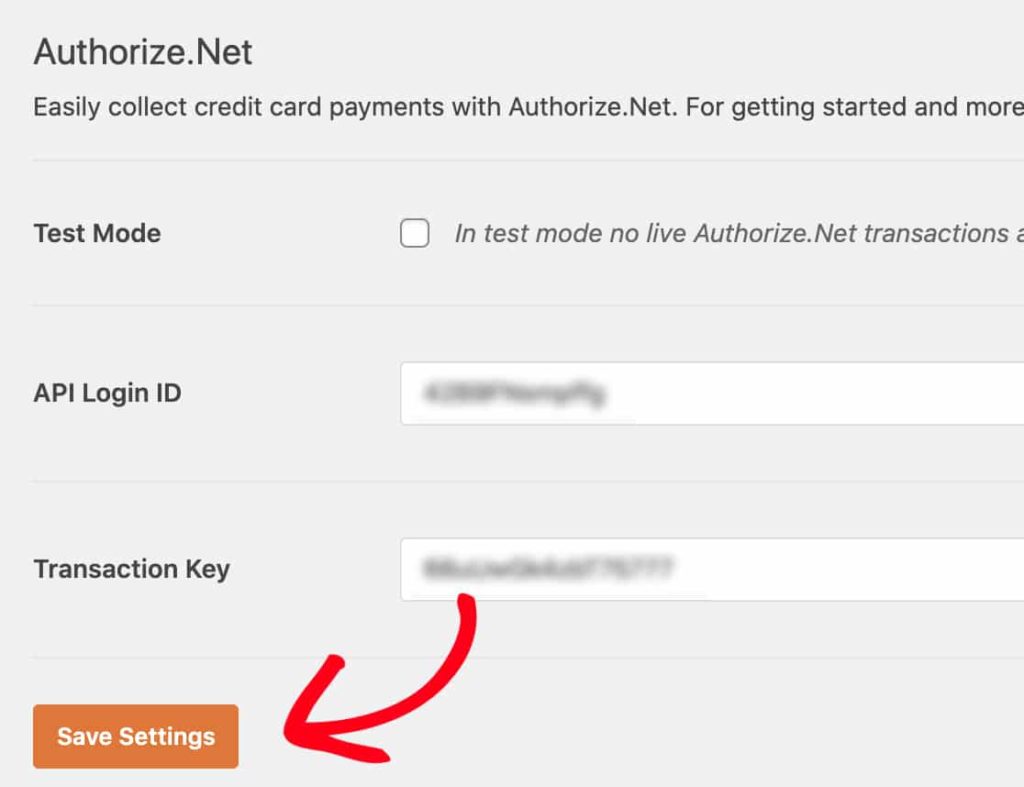
- Now go to the Authorize.net section, You’ll be needing API Loging ID & Transaction Key to complete this process. To get the keys you need to sign in into your Authorize.Net account first and if you don’t have one then please register.
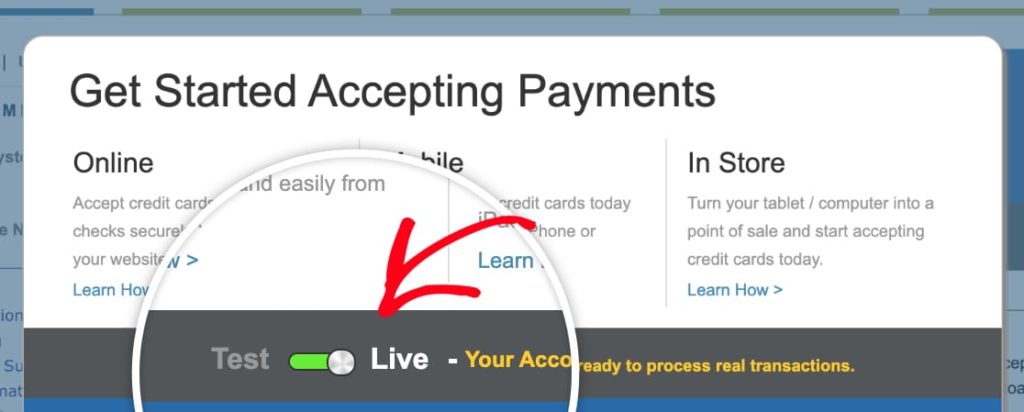
- Once you’ve logged in into your account, Find out if your account is in the Test or Live mode and if it isn’t Live then set the option to Live.
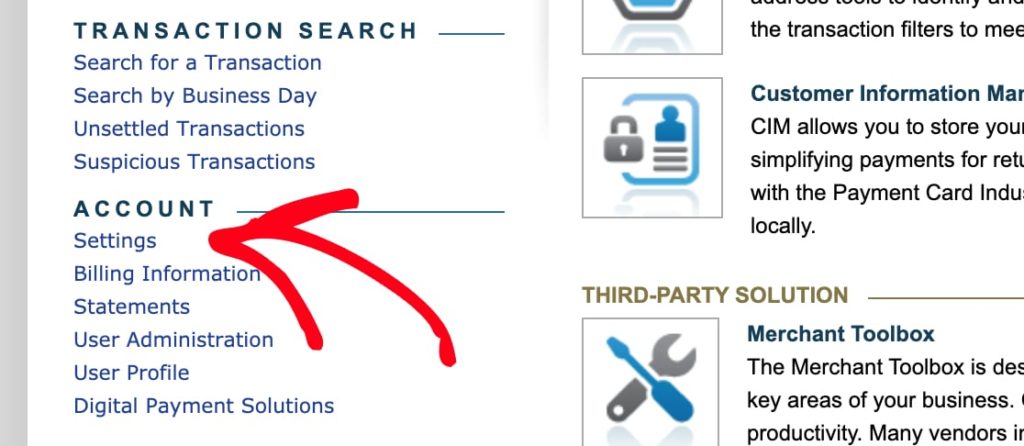
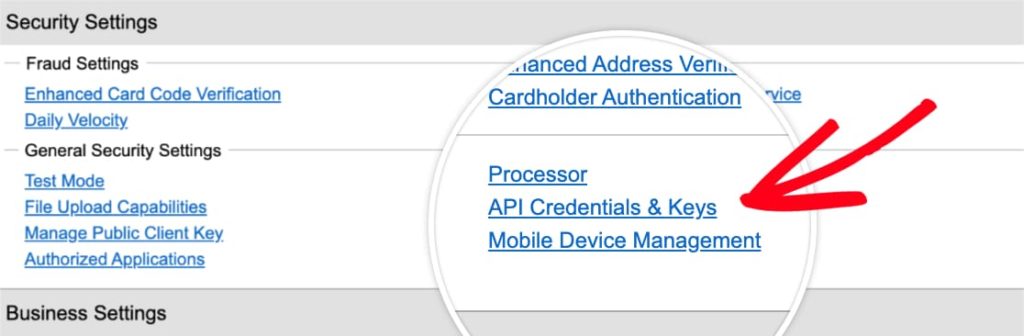
- Select settings and click on the API Credentials and Keys option.
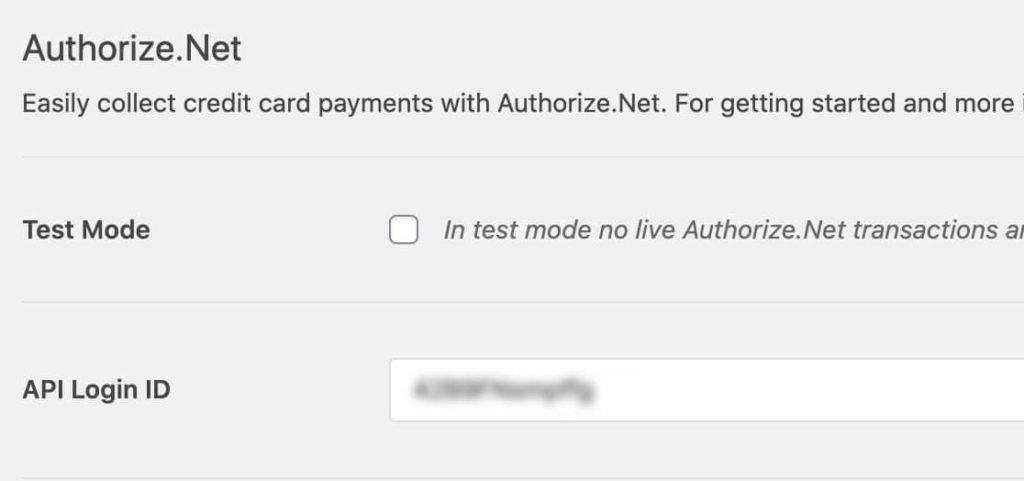
- You will get your API Login ID from there.

- Copy the ID and paste this back into your WPForms Settings page in your API Login ID field.
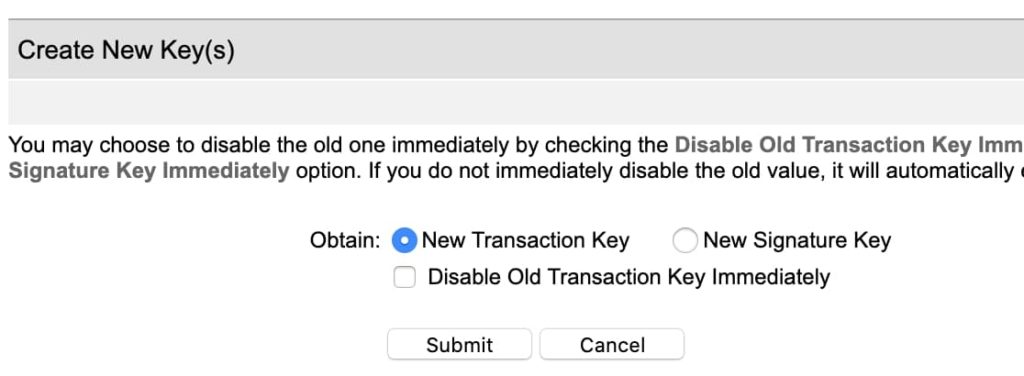
- In the Obtain menu, select New Transaction Key and then tap the Submit button.
- A pop up Window will appear that will ask to verify your identity. Click on the Request PIN to initiate the verification process.
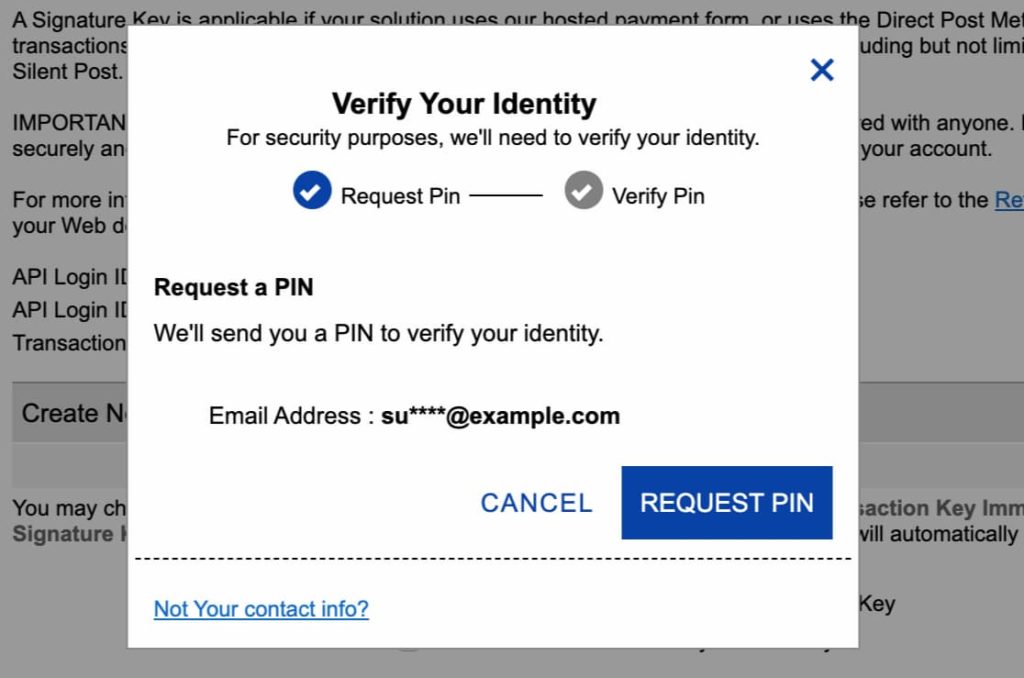
- After verifying your identity, Authorize.net will give you your transaction ID.

- Copy & Paste this transaction ID back into the Test Transaction Key field in the WPForms Settings and then click on Save Settings.
That’s it! You are done with your configurations.
How to Accept PayPal Payments in WordPress without a Shopping Cart?
People who prefer the convenience of payment on their smartphones or PCs usually seek PayPal as a secure and easy method.
If you also prefer PayPal over credit or debit cards, then you can also accept PayPal payments in WordPress without a shopping cart.
To do so, you can follow the below-mentioned steps:
- Log into the website that you created on WordPress
- Click on Plugins and select the “add new” button on the WordPress dashboard at the left menu.
- On the search menu, type “PayPal Buy Now Button” at the top right.
- Then install the plugin and activate it.
- Pick your preferred language and the currency that you want to use.
- Add the email address or the Merchant ID that you use for your PayPal.
- Then pick a button style from the available list.
- Save all your necessary changes, and you will be good to go!
Accepting Credit Card Payments in an Online Store
To accept credit card payments in an online store, WooCommerce can be an exceptional alternative. The platform integrates effortlessly into WordPress and can transform any website into a full-fledged functional store within no time.
Setting up payments with WooCommerce is not difficult as well. Let’s take the example of Stripe as a payment option and explain how.
- At first, you need to install the Stripe Payment Gateway Plugin in WooCommerce.
- Then click on settings in WooCommerce at the left menu of your WP dashboard.
- Click on the box that appears to enable stripe.
- Enter all the details in the form, including the necessary keys obtainable from the Stripe account.
- Then ensure to click on the box next to Force Secure checkout, and
- Save all the required changes.
Accept Credit Card Payments on a Membership Website
To increase customer retention rates and facilitate repeat buying, membership websites are getting more and more typical nowadays.
There are membership websites that offer premium content for minimal subscription fees, and if you are trying to start your own membership site, then WordPress Payments can be the most reliable alternative for you.
You might be searching for the best WordPress credit card payment plugin, but the good news is that you can have two.
For people who are planning on launching something like a membership website, they can do so with the help of WooCommerce and MemberPress.
1. WooCommerce Memberships

WooCommerce also enables membership options, and the platform costs about $199 per year.
The best part is it is extremely straightforward to use, and you can exercise many features when you switch to WooCommerce.
However, there are a lot of steps involved in the configuration of WooCommerce Membership, so click here to know those.
2. MemberPress
This plugin accepts payment from Stripe as well as from a number of payment gateways. To make it simpler for you, here is a guide on setting up a stripe as a payment method for membership.
- For one, you need to install and set up MemberPress.
- Then you must select the settings of MemberPress from the WordPress dashboard.
- Click on the payments tab and tap on Stripe as your preferred method of payment.
- Click on the blue connect icon with stripe button.
- Then on the pop-up screen, login using your stripe credentials and click submit.
- Click on the “Already have an account” icon.
- Sign in and select “connect to my stripe account icon” present on the next page.
- Click on Update options when redirected to the homepage of MemberPress.
- On the MemberPress menu present at the left, select Memberships and set up your membership options.
- Connect the membership links with your web pages or sections as necessary.
How to Accept Donations in WordPress
Some sites also have a specific charity or donation sections that help them to raise funds for specific causes.
You can also include a way to accept donations in your WordPress site by using the GiveWP plugin. This is one of the best WordPress payment plugins for donations that cost about $15 per year.
It is a premium plugin, so you will have to spend some money, but it will make it comparatively easy for you to accept donations.
To set up the plugin, you need to follow the below-listed steps:
- Install the GiveWP plugin and activate it in your WordPress.
- Then select the settings and donations available on your WordPress dashboard.
- Click on the tab of payment gateway and select your preferred choice by ticking on the box.
- Then fill in the details that involve adding your APIs, email addresses as well as other necessary information.
- Click on the add form under the Donation options to curate your own donation form.
- Then enter all the details and fill the form as necessary. Don’t forget to enter the donation amounts as well as the donation goals.
- Then enable your form and click on Publish.
- There is a Give Form shortcode above the publish icon; copy that.
- Then configure it in your WP website or wherever you want the donation link to appear.
Voila! You are ready for a donation.
Now you are ready to accept online payments on your WordPress site!
Finding the ideal way to add a payment gateway in WordPress is something that you need to think about before setting up your site. Having trouble with payments is what frustrates the customers the most. So, start accepting payments online with the PayPal Buy Now button plugin.
Also, if you want to facilitate more than one payment gateway for your customers, then WooCommerce is the best way to do so. It offers your valuable consumers better and more alternatives.
Plus, as the Authoriz.Net plugin is a complete package of top-notch features, you can easily set up your e-commerce store while simplifying the payment alternatives.
Image Source: https://wpforms.com/docs/how-to-install-and-use-the-authorize-net-addon-with-wpforms/