Are you wondering how to easily add Google Analytics to WordPress? Well, then, you are on the right post at the moment. This is going to be a comprehensive post and I will walk you through every single detail that you would ever need to know to add Google Analytics in WordPress.
Most beginners think learning Analytics is kinda difficult and not everyone’s cup of tea. However, this isn’t true and once you step into the world of Analytics, this is going to be a lot of fun and it will also allow you to have a better understanding of your audience like their demographics, their interests, from which channel your audience is coming to your website and a lot of other helpful metrics. . So, without further ado, let’s dive in.
What is Google Analytics?
Google Analytics is a free web-based tool by Google which helps you analyze your site traffic and understand your site’s performance.
When you have a website with a view to earning ROI, and you invest in various marketing campaigns like SEO, Social Media Optimization, and PPC, you must know how well these techniques and campaigns are doing. This is where the Google Analytics tool comes into play.
Wondering how Google Analytics works? It tracks the performance of your site using a unique tracking code. The tracking code is generated after you sign up for the tool using your Google account. The tracking code is then added within the <head> </head> section and saved.
Google Analytics collects the data in four ways:
- It collects the data at the user level relating to the actions of every individual user (User level)
- It collects the data of the session of every individual visitor (Session level)
- It collects the data of every page visited (Pageview level)
- It collects the data of button clicks and video views (Event level)
In simple words, the GA will help you know the traffic sources, the traffic behavior, bounce rate, and which pages or posts are getting more views.
Why Is It Important to Install Google Analytics on Your WordPress Website?
Installing Google Analytics on your WordPress website is always recommended and even if you run a website just for fun’s sake, knowing how well the content is doing is always good to know.
Besides, if you have an income-focused site, adding Google Analytics to your site will provide you with valuable insights about your traffic comprising page views, session duration, bounce rate, pages per session, social overview, benchmarking, Adwords campaigns, and many other useful metrics.
Further, having the insights generated in the WordPress dashboard itself makes things less cumbersome since you don’t have to get to the Google Analytics web app every time to see the insights. This isn’t difficult to do and you can do it by adding Google Analytics code manually or using certain plugins.
How to Signup for Google Analytics?
Before you can understand how to use Google Analytics right on your WordPress dashboard, let me walk you through the process of signing up with Google Analytics. I will explain the process in a step-by-step manner and it shouldn’t be difficult for you to follow.
Step I:
To get started, you can visit: https://analytics.google.com/ and after you get there, click on Set up for free.

Step II:
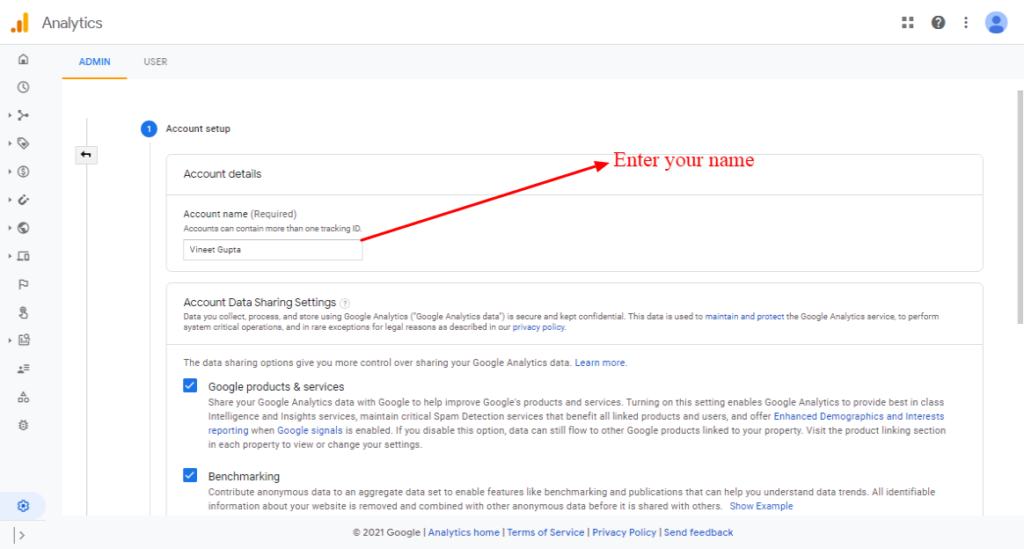
Then, you need to fill in the account name and proceed to the next step.
Editor’s Note: All the properties(website/blogs) that you will have will be listed under this Account name. You can name it either with your name, your company’s name, or anything else that makes it easy for you to identify the websites under this Account.
Step III:
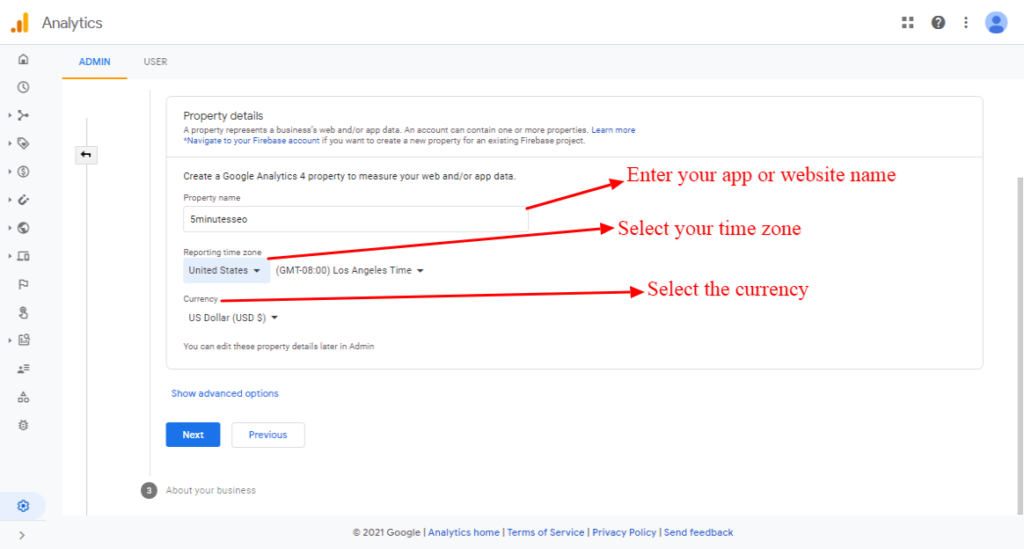
Next, you have to fill in the Property details. It’s filling in the name of your website or app. After you do this, you could proceed to the next step.
Step IV:
In this step, you have to select the industry relevant to your property. Besides, you must specify your business size and also, describe how you intend to use Google Analytics by ticking one or more checkboxes. You could then proceed to the next step.
Step V:
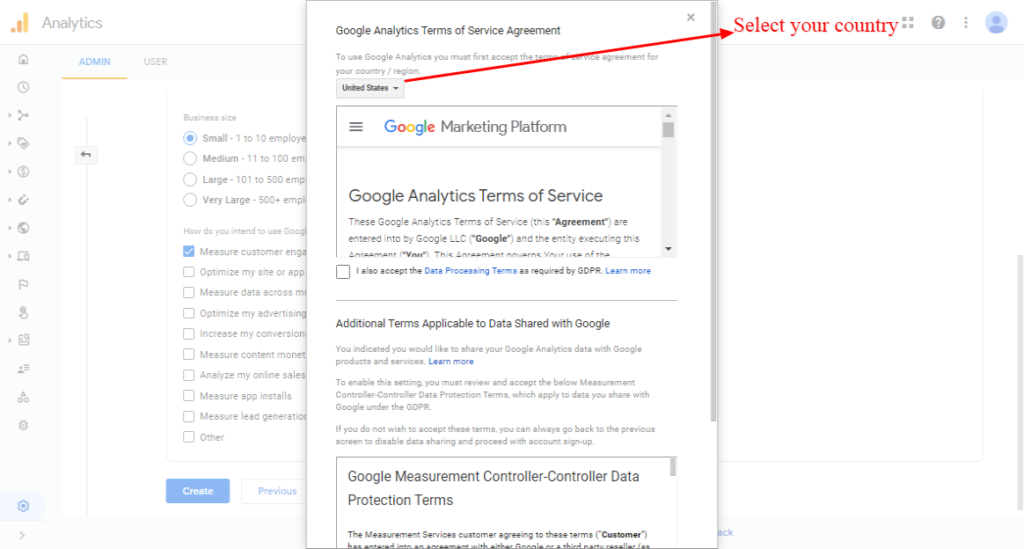
Now, you have to select your country and besides, and you can go through the terms of service and agree.
Step VI:
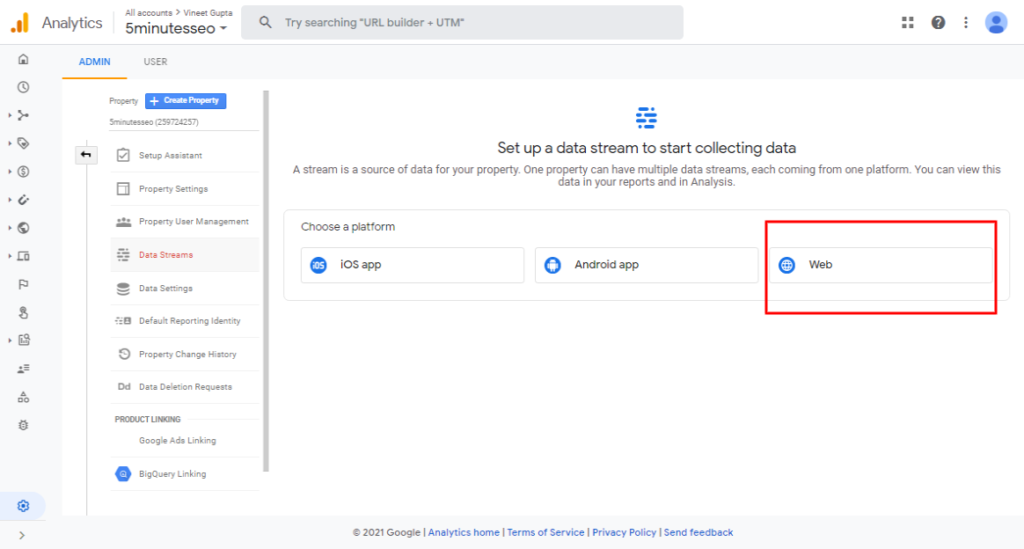
In this step, you can select between 3 options; iOS app, Android app, and Web. You can choose the option, web if you want to add your website else you can choose between the other two options depending on your platform. However, we selected the option, Web.
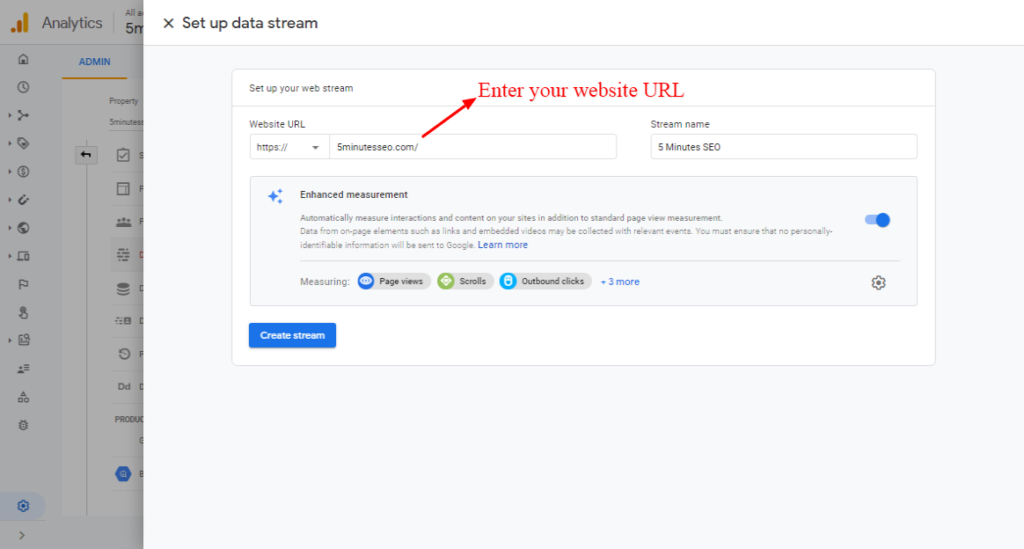
Step VII:
Now, you will be presented with a pop up with a field to enter your site URL. However, before you enter your site URL, you have to choose between http:// and https://. I suggest you choose https:// but before that, you must ensure your site has SSL enabled. Next, you can enter your site URL. In the Stream name field, you can enter the name of your site. After that, you could click on Create stream.
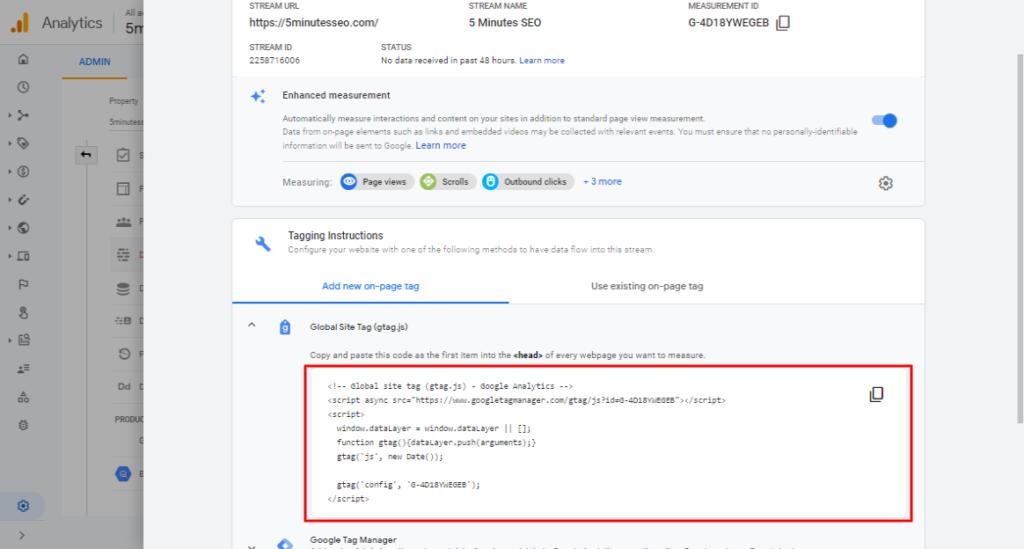
Step VIII:
On this page, you can find the global site tag by clicking on the Global Site Tag. You can copy the script and paste it in the head section of your site, right before </head>.
How to Add Google Analytics in WordPress Using a Plugin – Monster Insights (Easiest Way)
Even though you can integrate Google Analytics in WordPress by adding the script to the head section of your index.php or header.php file, integrating Google Analytics through the MonsterInsights WordPress plugin has many advantages.
Monster Insights, the Google Analytics WordPress plugin comes with many advanced functionalities.
Features of MonsterInsights WordPress plugin:
- Offers you website tracking across all devices and campaigns
- Allows you to view your Google Analytics right within the WordPress dashboard
- Helps you do better with real-time stats
- Helps you in identifying the most popular sections, posts and pages
- Allows you to track clicks on your affiliate links and ads
- Helps you optimize your website’s performance with A/B testing
- Offers seamless integration with various popular plugins and services
Steps to Integrate Monsterinsights With Google Analytics
Step I:
Head over to Plugins section.
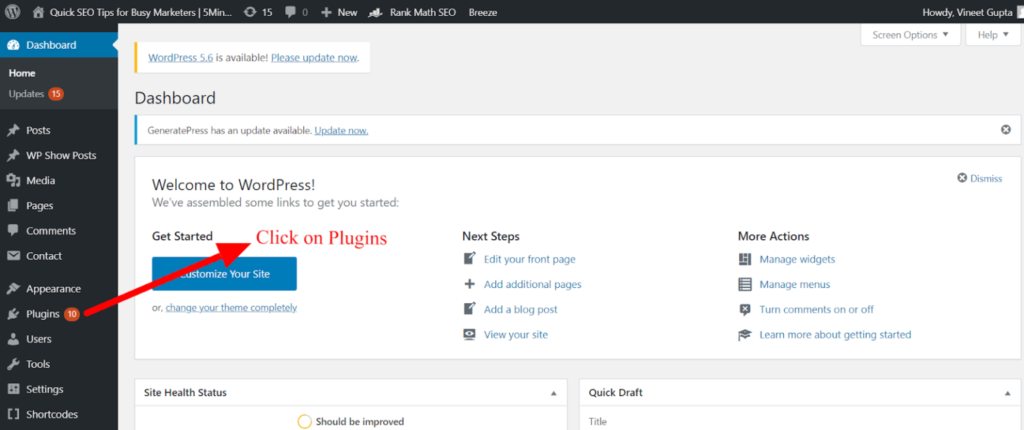
Click Add New
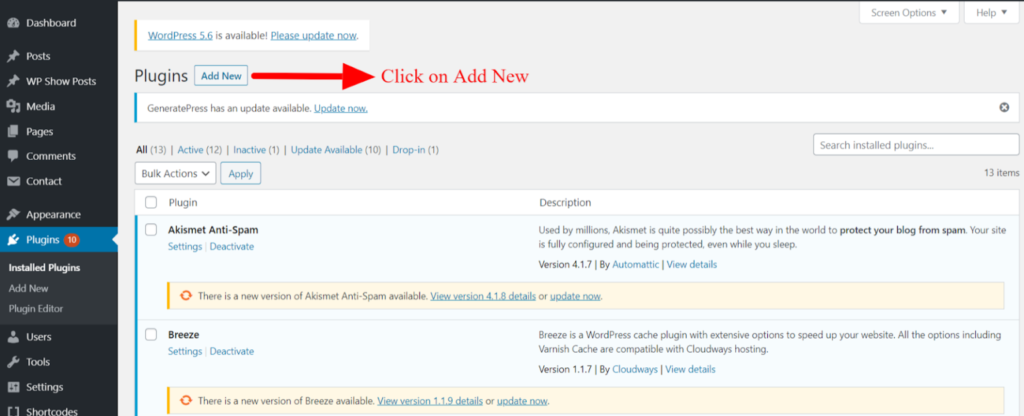
Step II:
Now, type MonsterInsights
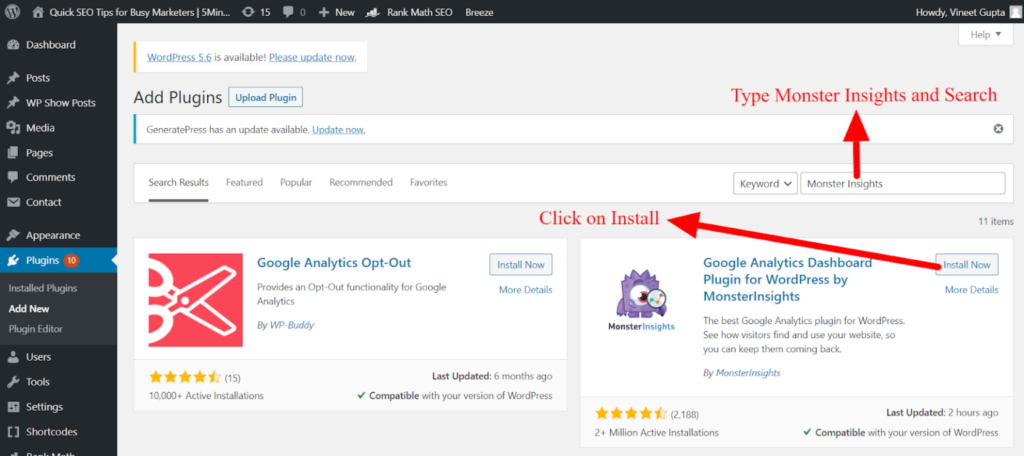
You will see MonsterInsights plugin, Click on Activate & then Install.
Step III:
After activation, you would see a new menu item, ‘Insights’ on the left of your WordPress dashboard.
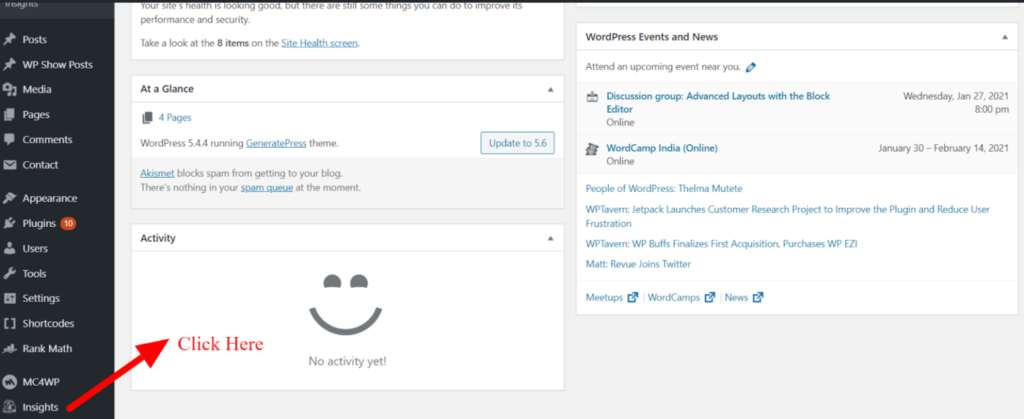
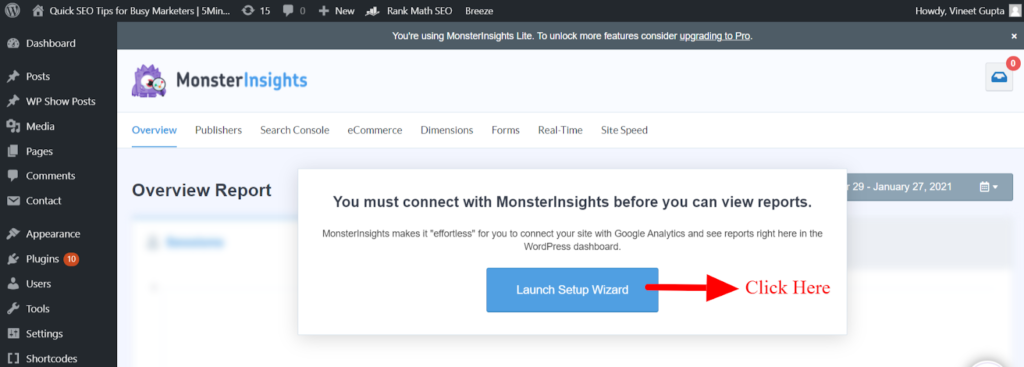
Click on it to get to the MonsterInsights setup wizard, the Dashboard will appear in that Click on Launch Setup Wizard.
Step IV:
After you get there, you must choose your relevant category from the 3 available options and click on “Save and Continue”.

Step V:
Next, you have to click on the “Connect MonsterInsights” button.

Step VI:
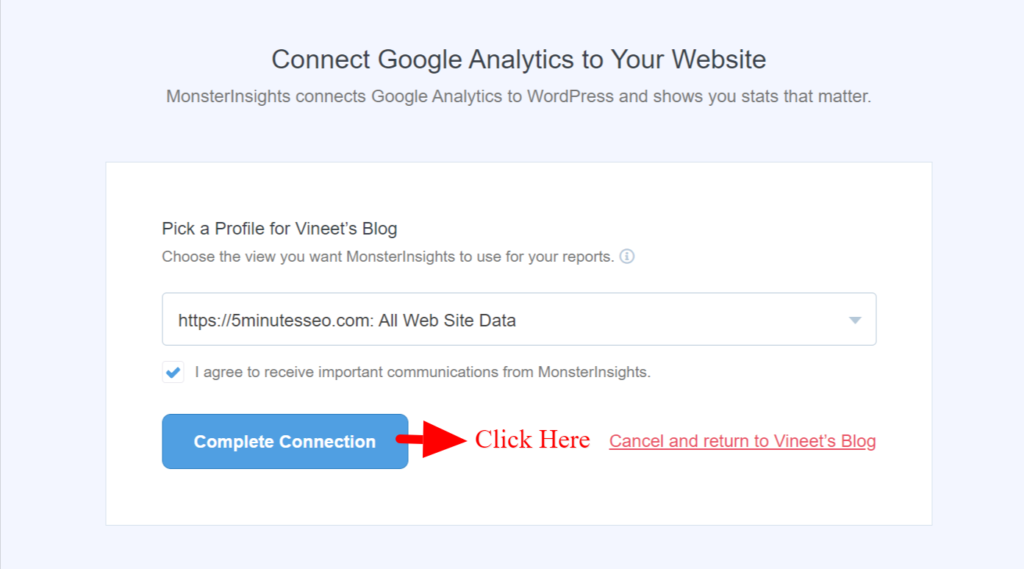
At this point, you shall be asked to sign in using your Google account and good practice would be to connect the same Google account with which you created your Google Analytics account.

Once you click on the Allow button, you will be asked to select the website that you want to track and you can click on Complete Connection.
Step VII:
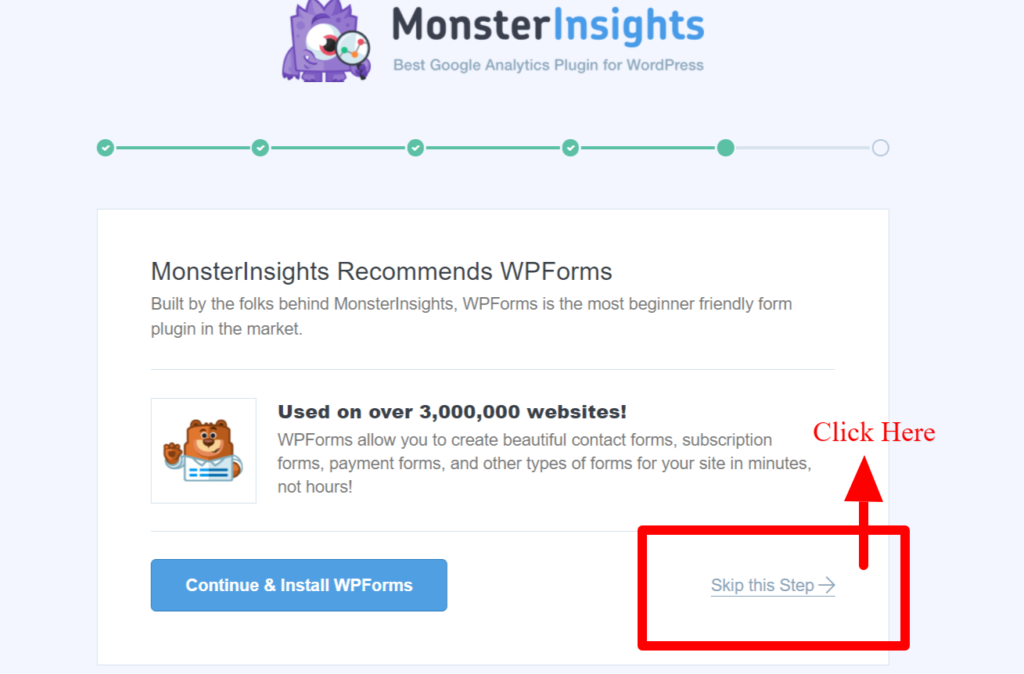
With this, MonsterInsights is successfully added to your website and besides, the tool will suggest certain recommended settings as well. You are good to go with the default settings.
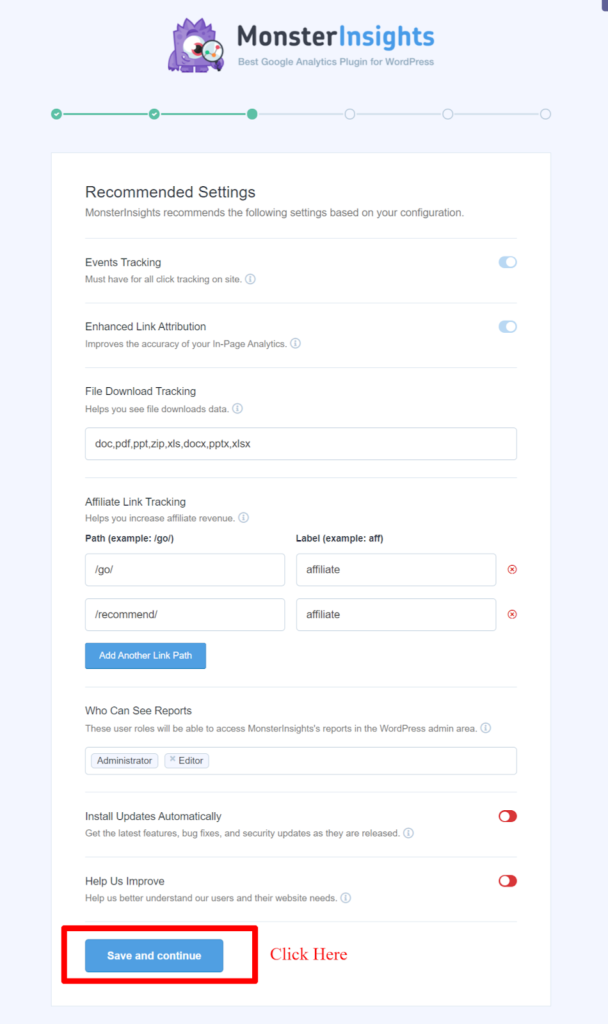
If you have an affiliate link plugin to cloak the links, you can specify the path in the Affiliate Link Tracking section of MonsterInsights, which will eventually track your affiliate links in Google Analytics. After that, you can click on “Save and Continue.”
Just to bear in mind, you can have this entire set up done for free with a free MonsterInsights account. However, for other advanced functionalities, you can upgrade to the MonsterInsights Pro and besides, use certain add-ons.

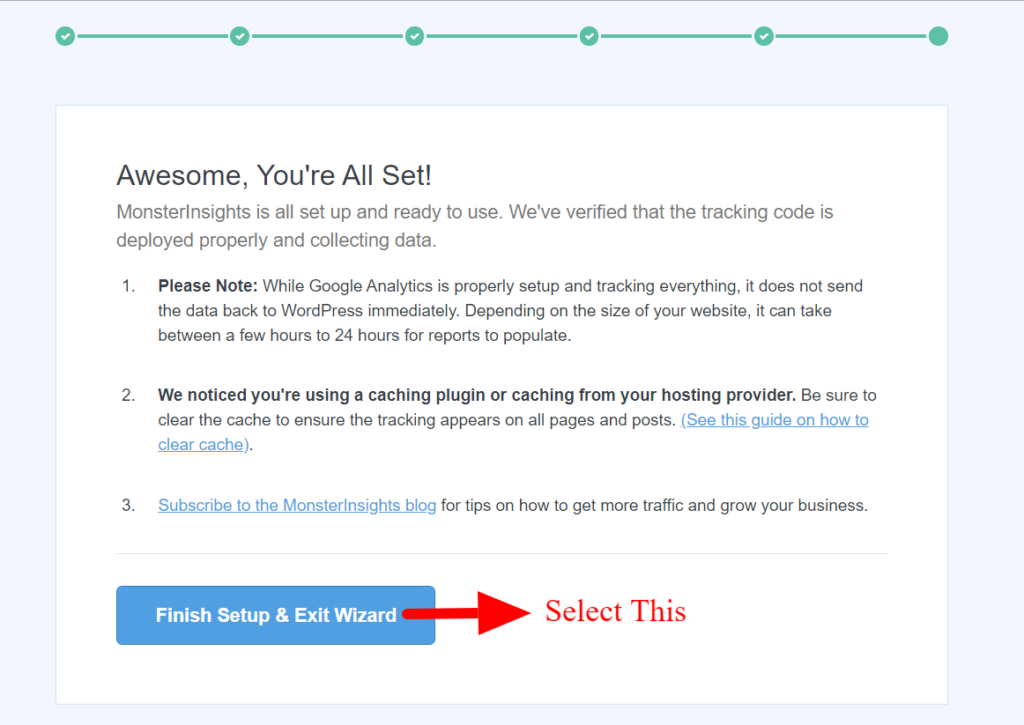
Congratulations! You have successfully added Google Analytics to your WordPress website with the help of MonsterInsights plugin.
How to Embed Google Analytics in WordPress Without a Plugin – by Adding Code in the Theme File
Just as pointed in the beginning, you can also add Google Analytics in WordPress without having to depend on any plugin. Many of you may not find it user-friendly advice but it will take just about a few minutes if you follow the instructions carefully and you won’t go wrong for sure.
Follow these simple steps to add Google Analytics to your site without using any plugin:
Step I:
Log in to your Google Analytics account. Next, click on the option, Admin, located at the bottom and then click on Data Streams.
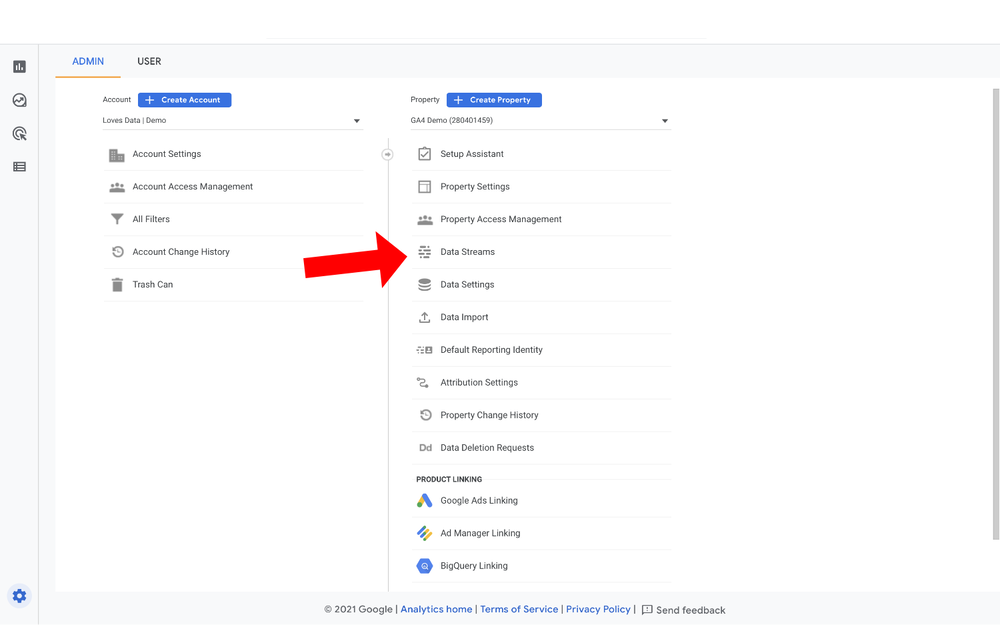
Step II:
Right after you click on Data Streams, you should see your streams, and be more precise, your website along with its URL. Next, you can click on it and this will present you with a pop-up.
After the Web Stream Details pop-up appears, you can get your Google Analytics code by clicking on the Global Site Tag. Next, you can copy the code and head over to your WordPress dashboard.
Editor’s Note: If you are not sure where to add this code then I will highly recommend you not to mess with the code else it may break your website. Better would be to use a simple plugin like Monster Insights and you will have access to all the Google Analytics metrics in your WordPress Dashboard.
Step III:
Next, go to the WordPress dashboard, you need to click on Appearance, and under this tab, you need to select the Editor, and select the file that has the closing </head> tag. For my site it’s header.php so I have selected that.
Step IV:
Next, you have to open the header.php(or the file that has </head> tag), and paste the Google Analytics code.
Editor’s Note: Before you can add the Google Analytics code to your header.php file, you must make sure that you backup the code or the file first. After that, you can add the Google Analytics code right before the </head> and hit Update File.
3 More Plugins That Can Help You Add Google Analytics to Your WordPress Website
Apart from the ways explained so far, you can connect Google Analytics to WordPress using other WordPress plugins. Even though there are several plugins around, I have tested some and I can confidently recommend the following 3 plugins to add Google Analytics to WordPress.
1. ExactMetrics
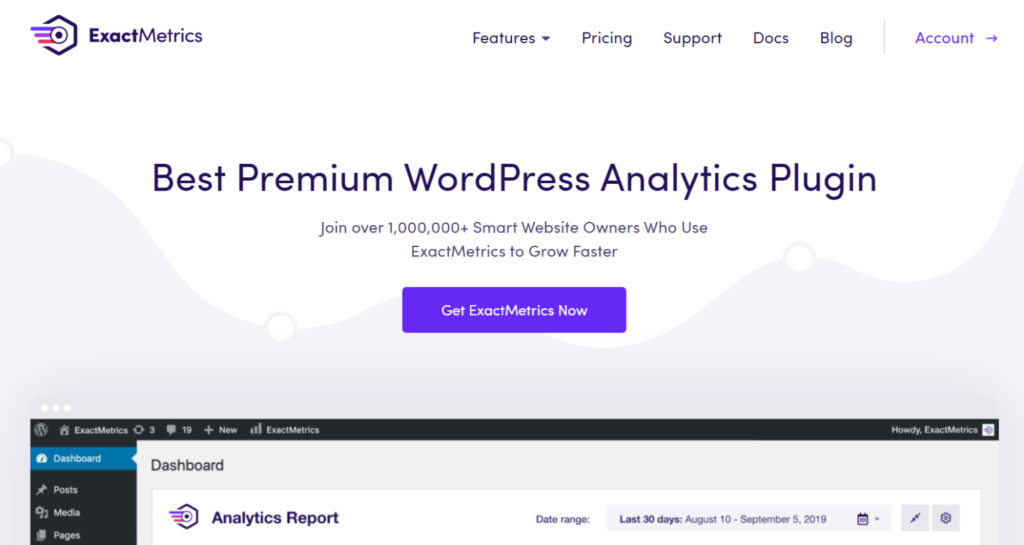
ExactMetrics is a pretty popular Google Analytics plugin for WordPress and has been around for a long time. The good thing is the plugin is free to try. Besides, it is pretty easy to use. Let’s quickly look at all its features.
Features:
- Offers real-time stats
- Allows you to view analytics on your WordPress dashboard
- Offers Page-level insights
- Helps you track the AMP version of your site
- Offers Affiliate Ad tracking
- Allows you to optimize performance with A/B testing
2. WP-Analytify

WP-Analytify has an innovative way of displaying Google Analytics data on your WordPress site. The tool displays the Google Analytics data at the front end of the posts and pages, backend, and in its own dashboard. This means you always have quick and multiple access points to your Google Analytics data.
As far as the setup goes, it is ridiculously easy and requires nothing more than a one-time and one-click authentication using your Google account (one that is connected to your Analytics account). This will automatically connect your Google Analytics account to your WordPress site without the hassle of copying and pasting the Google Analytics code manually.
Features
GA Google Analytics is a lightweight WordPress plugin and comes with a lot of advanced features. The plugin is available in both free and Pro versions. It’s time that we look at its features:
- Set up is super easy
- Displays data at various places on the website
- Support shortcodes for custom statistics
- Offers Social Media statistics
- Shows you real-time data
- Display bounce rates of top pages
3. GA Google Analytics

Features:
- Easy to set up and use
- Includes tracking code on the header, footer, and all web pages
- Allows you to add your own custom markup
- Allows you to customize the tracking code
- Live preview of all tracking codes
- Configure multiple tracking codes
Can’t wait to add Google Analytics to WordPress!
I understand how excited you must be right now after having gone through this comprehensive post on how to add Google Analytics to WordPress and it isn’t that difficult as you presumed to be, right? I explained all the possible ways you can go about it but most importantly, you ought to first create a Google Analytics account. Creating one shouldn’t be difficult with our step-by-step explanation.
I have already made you much aware of the crucial role of Google Analytics in analyzing a site’s performance. When you have a site, you would surely want it to grow over time and Google Analytics will help you at every level in identifying the places that need improvement as well as, in knowing your site’s overall performance.
As far as the method of setting up Google Analytics on WordPress goes, it’s totally your call and you can choose from any of the ways that we mentioned in this post. However, after you get much familiar with Analytics, I suggest you switch over to an advanced Google Analytics WordPress plugin such as MonsterInsights Pro for better insights to improve your ROI.